Launch an MSIX Application from the Command Line

This blog explains how we can launch an MSIX application from the command line.

First, we need to get the name of the MSIX application shortcut that we want to launch from the command line, and retrieve its associated AppID.  We can do this easily by opening a Powershell.exe console and running:

get-startapps

We can then filter on the specific application we’re interested in using the -Name parameter like so:

get-startapps -Name "VLC media player"

Once we have the name of the application, we need to retrieve the AppID like so:

get-startapps -Name "VLC media player" | Select -ExpandProperty AppID 

And now we have the AppID, we can launch it from a PowerShell session like so:

Start-Process -FilePath shell:AppsFolder\$(get-startapps -Name "VLC media player" | Select -ExpandProperty AppID)

And of course, if we want to launch it from a non-PowerShell session (perhaps a command prompt) we can launch it like so:

powershell.exe -Command "Start-Process -FilePath shell:AppsFolder\$(get-startapps -Name 'VLC media player' | Select -ExpandProperty AppID)"

Alternatively, if we weren’t fussed about launching the application dynamically, we could just retrieve the static command line like so:

 write-host "explorer.exe shell:AppsFolder\$(get-startapps -Name "VLC media player" | Select -ExpandProperty AppID)"

Which would result in something similar to this:

explorer.exe shell:AppsFolder\VLC3.0.18_c9pt9p6bt4qgy!VLC

Or alternatively, just get them all and manually find the right application!!

cls

foreach ($app in get-startapps) {
    $appName = $app.Name
    $appID = $app.AppID
    write-host "Shortcut Name: $appName"
    write-host "Shortcut Path: explorer.exe shell:AppsFolder\$appID"
    write-host ""
}

And that’s it!  Happy MSIX launching!


Create an App-V Streaming Server now the App-V 5 Server Components are Deprecated

This blog explains how to create an App-V streaming server now the App-V 5 server components are deprecated.

With the recent news that Microsoft are extending support for the App-V 5 client and sequencer, but ending support for the server components, it’s made many organisations ponder their next steps in terms of application delivery.

While the App-V client and sequencer are sticking around (for the time being), organisations will need a new approach when delivering their App-V applications if they are to continue using a supported software delivery platform.

Why App-V Streaming Over HTTPS?

Streaming App-V applications over the SMB protocol (for example, from a network share or distributed file systems (DFS)) might work relatively well but perhaps isn’t always optimal in terms of speed, efficiency and security. And if organisations suddenly start routing all application streaming traffic over the SMB protocol instead of HTTP, it might have significant implications for poorly designed networks, especially those running inefficient applications across disparate locations.

Streaming apps over HTTPS using an App-V 5 streaming server may have several advantages over streaming from an SMB network share:

  • Secure end-to-end, encrypted streaming traffic over SSL.
  • Routing streaming traffic over the HTTPS protocol as opposed to the SMB protocol.
  • Optimised caching of packages on a server, reducing disk I/O and CPU on the server.
  • The ability to load balance App-V streaming servers.
  • More reliable data transfers on lossy networks by using TCP instead of SMB.

All of this made me wonder if we could create our own, “supported” App-V streaming server without the App-V management and reporting features?  My thoughts being that we could potentially use our own streaming server alongside a software delivery/management solution such as Recast Application Workspace (RAW)?

With that said, and since I’m a big fan of RAW, I thought I’d put it to the test! I must give kudos to Ingmar who wrote a fantastic article many years ago which I have taken inspiration from whilst appending some new ideas.  So let’s get cracking….

Create an App-V 5 Streaming Server Now the App-V 5 Server Components are Deprecated

Assumptions: You are relatively familiar with Windows Server and Internet Information Services (IIS).

Disclaimer: I am explaining how to create this in a development environment.  Your requirements may be slightly different in production.

  1. Ensure that in Roles and Features you have IIS and Windows Authentication installed.Windows Authentication
  2. Install the URL rewrite module from here.
  3. Assuming a default install of IIS, create a directory under C:\inetpub\ called (for example) appv.  Under this directory, create another directory called apps (this is where you will place your App-V packages).  Inside the appv folder, create a text file called index.html with the following content:
    <html>
        <head></head>
        <body>
        Welcome to the App-V Streaming Server.
        </body>
    </html>

    Create another text file called 403.html with the following content:

    <html>
        <head></head>
        <body>
        This server can only be used for streaming from the App-V Client.
        </body>
    </html>
  4. Create a Self-Signed Development Certificate Trusted by Microsoft Edge so we can stream applications securely over HTTPS. If you follow the article correctly, the certificate will be available to bind in the next step.
  5. Close (if open) and reopen IIS. Right-click on Sites and click Add Website. Set the name of the site to appv. Set the physical path to c:\inetpub\appv. Create a binding for https using the certificate we created earlier, where alkaneweb (in my instance) is the name of my development web server. Make a note of the application pool name.
  6. Make sure port 443 allows inbound traffic in firewall on the web server.  If not, open Windows Firewall (wf.msc), right-click on Inbound Rules. Click New Rule. Click Port. Specify TCP port 443. Select Allow Connection. Select Domain.  Give the rule a name, and save it.
  7. Back in IIS, highlight the website, click on Authentication (Under the IIS section) and disable everything (Anonymous authentication, Basic authentication etc) and enable only Windows Authentication (assuming you’re using domain-joined computers).
  8. Right-click on the website and click “Edit Permissions”.  Go to the Security tab. Click Edit. Click Add. Change the Location to the web server itself (not the domain).  In the object name search, enter: IIS APPPOOL\[Application Pool].  Where [Application Pool] the is the name you recorded in step 2. Give it the default Read and execute permissions.  Click OK.  Click OK.
  9. With your website highlighted, open MIME Types.  Click Add.  The extension should be .appv and the mime type should be application/appv.  This allows .appv files to be served from IIS.  The trouble is, it also means that users can hit the URL of an .appv file and download it!  We don’t want that.  So we create a URL rewrite rule to only allow the App-V client to be served .appv files.
  10. With your website highlighted, click .Net Authorization Rules.  Add Deny Rule.  And select All Anonymous Users.
  11. With your website highlighted, click URL Rewrite. Click Add rule. Since the App-V Client uses the user agent string of App Virt Client/1.0 we add a rule to only permit that user agent string and deny everything else:
    1. Requested URL: Matches the pattern
    2. Using: Regular Expressions
    3. Pattern:
      .*\.(appv)$
    4. Ignore Case: True
    5. Logical Grouping: Match all
    6. Add a condition:
      1. Condition input: {HTTP_USER_AGENT}
      2. Check if input string: Does not match the pattern
      3. Pattern: ^App\sVirt\sClient/\d+\.\d+$
      4. Ignore case: True
      5. Click Ok
    7. Action Type: Redirect
    8. Redirect URL: /403.html
    9. Append query string: True
    10. Redirect Type: Temporary (307)
  12. When you make the configurations above, it will generate a web.config file in your website’s root folder.  It should look similar to this:
<?xml version="1.0" encoding="UTF-8"?>
<configuration>
	<system.web>
		<authentication mode="Windows" />
		<authorization>
			<allow users="*" />
			<deny users="?" />
		</authorization>
	</system.web>
        <system.webServer>
		<staticContent>
            		<mimeMap fileExtension=".appv" mimeType="application/appv" />
        	</staticContent>
		<rewrite>
			<rules>
				<rule name="Allow Specific User-Agent for .appv" enabled="true" stopProcessing="true">
					<match url="\.appv$" />
					<conditions>
						<add input="{HTTP_USER_AGENT}" pattern="^App\sVirt\sClient/\d+\.\d+$" negate="true" />
					</conditions>
					<action type="Redirect" url="/403.html" redirectType="Temporary" />
				</rule>
			</rules>
		</rewrite>
	</system.webServer>
</configuration>

We will now configure some of the optimisations detailed by Ingmar.

  1. In IIS, with your website highlighted, click Configuration Editor (under Management).  At the top, search for system.webServer/serverRuntime. Set the following values (cache .appv files the first time they are requested):
    frequentHitTimePeriod="00:00:01" 
    frequentHitThreshold="1"
  2. Kernel-mode and user-mode caching are enabled by default, but here we optimise the file cache size and cache time-to-live. This registry key is used by the file cache to determine the maximum size of a file that can be cached.  If the file size is greater than this value, the file will not be cached. Since there is no documented max file size for App-V 5, we set this to 8GB for the time being. Run the following PowerShell script as Administrator:
    Set-ItemProperty -Path "Registry::HKLM\System\CurrentControlSet\Services\InetInfo\Parameters" -Name "MaxCachedFileSizeInMB" -Value 8192 -Type DWord
    

    The following registry key is used by the user mode file cache and the kernel mode output cache. Both the caches run a scavenger operation for ObjectCacheTTL every seconds (600 seconds, or 10 minutes in our case).  We retrieve the .appv package from the memory of the webserver instead of the fileserver if it’s downloaded within 10 minutes of caching.

    Set-ItemProperty -Path "Registry::HKLM\System\CurrentControlSet\Services\InetInfo\Parameters" -Name "ObjectCacheTTL" -Value 600 -Type DWord


And that’s it!  Hop on to a domain-joined computer and try accessing your web server using, for example, https://[your-webserver]/.  Hopefully you hit a page saying “Welcome to the App-V Streaming Server.”.  If you get credential prompts using Microsoft Edge, make sure your site is added to the Intranet zone. We can now perform a few tests:

Testing App-V 5 Publishing (From a Domain-Joined Computer)

  1. Assuming you’ve placed a sample .appv file in your apps directory (called example.appv), try accessing it in a web browser using: http://alkaneweb/apps/example.appv.  Hopefully you will be redirected to 403.html saying “This server can only be used for streaming from the App-V Client”.
  2. Now, try adding an App-V application using PowerShell:
    Add-AppvClientPackage -Path https://alkaneweb/apps/example.appv

And if that worked, jump back on to your IIS server and verify that caching is working:

  1. In the Search box in Windows Server, type and run perfmon.
  2. Click the Performance Monitor node.
  3. Click the green Plus icon.  Scroll down and expand Web Service Cache. Select and add Current File Cache Memory Usage. Restart IIS to purge the existing cache.
  4. From the domain-joined computer, try removing (if installed) and adding an App-V package again (even fully mount it for a test) and verify that the cache is being populated on the web server.

Now I’d proved that my streaming server was working, I used RAW to deliver my applications to endpoints using beautiful “smart” icons.  A smart icon is basically a piece of digital awesomeness that enables users to click on a single icon, yet trigger multiple actions, in various contexts if required.

It took me about 2 minutes to create a smart icon that adds the package in a device context, publishes it in a user context, and launches it!  All with one click!

Can We Deliver MSIX via IIS and HTTPS?

Yes we can in theory.  However, MSIX doesn’t stream in the same way that App-V does so it might not be beneficial. Delivering MSIX over HTTPS utilises delivery optimisation and one of the caveats appears to be that it doesn’t play nicely with Windows Authentication enabled on the web server.  So we’d need to enable anonymous authentication (we could isolate a virtual directory for msix files if needs be).  Then modify the web.config file to support other mime types:

<staticContent>
    <mimeMap fileExtension=".appv" mimeType="application/appv" />
    <mimeMap fileExtension=".appx" mimeType="application/appx" />
    <mimeMap fileExtension=".msix" mimeType="application/msix" />
    <mimeMap fileExtension=".appxbundle" mimeType="application/appxbundle" />
    <mimeMap fileExtension=".msixbundle" mimeType="application/msixbundle" />
    <mimeMap fileExtension=".appinstaller" mimeType="application/appinstaller" />
</staticContent>

and also modify the URL rewrite rule:

<rules>
	<rule name="Only Allow Specific User-Agent" enabled="true" stopProcessing="true">
		<match url=".*\.(appv|appx|msix|appxbundle|msixbundle|appinstaller)$" />
		<conditions logicalGrouping="MatchAll">
			<!-- Block user agents not matching 'App Virt Client' with any version -->
			<add input="{HTTP_USER_AGENT}" pattern="^App\sVirt\sClient/\d+\.\d+$" negate="true" />
			
			<!-- Block user agents not matching 'Microsoft-Delivery-Optimization' with any version -->
			<add input="{HTTP_USER_AGENT}" pattern="^Microsoft-Delivery-Optimization/\d+\.\d+$" negate="true" />
		</conditions>
		<action type="Redirect" url="/403.html" redirectType="Temporary" />
	</rule>
</rules>

But even then, adding an MSIX package over HTTPS appears to be much slower than adding from an SMB network share on the same server.

It’s difficult for me to gather any performance metrics in a lab with no contention.  So if anybody implements this in an enterprise environment, let me know how you get on!

Escaping Quotes and Backslashes in JSON

This blog discusses escaping quotes and backslashes in JSON.

I was doing a deep(er) dive into Microsoft’s Package Support Framework for MSIX recently, and wanted to have a play around with some of the “fixups” provided.

Whilst I was fiddling around trying to make things work (due to Microsoft’s inaccurate and/or poorly documented examples!), I stumbled upon shortcut arguments inside a config.json file and thought I’d write a short blog post to highlight escaping quotes and backslashes in JSON.

Escaping Quotes and Backslashes in JSON

When we escape a character in JSON, we essentially prefix the character with a backslash (\).  So a " would become \" and a \ would become \\.

The example we will use is to JSON encode the following string argument:

-logfile "%TEMP%\Alkane Path\alkane.log"

We notice that the log file path contains a space, so we need to surround the path in quotes.

Escaping Backslashes in JSON

The first step is to escape the backslashes by prefixing them with another backslash like so:

-logfile "%TEMP%\\Alkane Path\\alkane.log"

Escaping Quotes in JSON

The second step is to escape the quotes with a backslash like so:

-logfile \"%TEMP%\\Alkane Path\\alkane.log\"

JSON Encoded String

We then paste this value into our config.json file (excerpt):

{
    "arguments": ""
}

Which results in a valid JSON file like so:

{
    "arguments": "-logfile \"%TEMP%\\Alkane Path\\alkane.log\""
}

Most people probably won’t want (or need) to understand this level of detail since they’ll use the GUI of the MSIX Packaging Tool to apply fixups.  But it’s useful to understand JSON for a plethora of other RESTful APIs, as well as our own free MSIX packaging tool.

MSIX Start Menu Shortcut Icons are Incorrect

You may attempt to package an MSIX and upon testing, realise that the MSIX Start Menu shortcut icons are incorrect.  That is, the shortcuts may contain duplicate icons or the shortcuts may be missing completely and have failed to capture!

The reason for this is typically because we have captured an application that installs multiple shortcuts pointing to the same executable, but with different arguments/parameters that perform different functions.  For example:

Shortcut 1 (runs main app): C:\Program Files\Alkane\App.exe

Shortcut 2 (runs app config): C:\Program Files\Alkane\App.exe -config

And even though they have different icons in the Start Menu at time of capture, the MSIX capture process interprets them as being “the same executable”, and either uses the same icon for each shortcut in the MSIX package or omits capturing the shortcut altogether!

MSIX Start Menu Shortcut Icons are Incorrect

There are a couple of ways to resolve the issue of MSIX icons being incorrect.  The first approach is slightly “hacky” should we say, but it works.  We will use the aforementioned executable path as an example for both:

Approach 1 – Fixing MSIX Shortcuts During Capture

Essentially what we do here is make a copy of the target executable during the capture process and trick the MSIX packager into thinking it’s a different executable, and hence it will generate the appropriate icons.  We then edit the package to point the shortcut back to the original executable, and delete the copy we made.

  1. Start capture.
  2. Install application.
  3. Make a copy of C:\Program Files\Alkane\App.exe and call it (for example) C:\Program Files\Alkane\AppConfig.exe
  4. Change the shortcut that points to C:\Program Files\Alkane\App.exe -config to point to C:\Program Files\Alkane\AppConfig.exe -config
  5. Stop the capture.
  6. In the Package Editor tab of the MSIX packager, under the Manifest File section click Open File. Replace all instances of AppConfig.exe in the AppxManifest with the original App.exe. Save and close the manifest file.
  7. Go to the Package Files tab, and delete AppConfig.exe.
  8. Save and close the package.

Approach 2 – Retrospectively Fixing MSIX Shortcuts Post Capture

If we were retrospectively fixing the icons without recapturing the application, we must do a few things:

  1. Create new icons!  There is a free application that can assist, given an initial PNG file.  Save the new icons into a staging directory called, for example, C:\Alkane\NewIcons.
  2. Extract the MSIX by renaming the extension from .MSIX to .ZIP and extracting.
  3. Copy the new icons from C:\Alkane\NewIcons to the Assets directory of the extracted package.
  4. Update the shortcut icon names in the AppxManifest.xml for the relevant application (typically within the <VisualElements> node).
  5. Regenerate the Resources.pri file (Windows SDK required).
  6. Recompile the MSIX (Windows SDK required).
  7. Sign the MSIX (Windows SDK required).

Luckily, our free MSIX packaging tool can do all this in a few lines of code:

Install-Module AlkanePSF
Import-Module AlkanePSF -MinimumVersion 2.2.3 -Force

#configure AlkanePSF
Set-AlkanePSFConfiguration -MSIXInputFilePath "C:\Alkane\Test.msix" `
-MSIXOutputFilePath "C:\Alkane\Test-fixed.msix" `
-MSIXStagingFolderPath "C:\Alkane\Staged\" `
-MSIXCertificateFilePath "C:\Alkane\alkanecert.pfx" `
-MSIXCertificatePassword (ConvertTo-SecureString "AlkanePassword" -AsPlainText -Force) `
-MSIXArchitecture "64" `
-PSFType "TM" `
-TimManganZipUrl "https://github.com/TimMangan/MSIX-PackageSupportFramework/blob/develop/ZipRelease.zip-v2024-10-26.zip?raw=true"

#install prereqs (SDK, Tim Managan's PSF etc)
Install-AlkanePSFPrerequisite -ForceReinstall $false

#Stage and extract our MSIX package (in the same location as our input MSIX) so we can apply fixups
New-AlkanePSFStagedPackage

#copy new icons to assets folder
Copy-Item "C:\Alkane\NewIcons\*" "C:\Appsource\Staged\Assets"

#Regenerate resources
New-AlkanePSFResourcesPRI 

#replace icon name in AppxManifest
Add-AlkanePSFStringReplace -FindRegex "Assets\\OLDSHORTCUTNAME-" -ReplaceString "Assets\NEWSHORTCUTNAME-"

#Generate config and update manifest
Set-AlkanePSF -OpenConfigJson $false

#Compile and sign
New-AlkanePSFMSIX

Free MSIX Packaging Tool for the Package Support Framework

This post provides a free MSIX Packaging tool for the Package Support Framework (PSF), and is hosted in the PowerShell Gallery.

Most of us already know that native MSIX has its limitations (at time of writing) in terms of compatibility with some applications.  For example, once we package an application into MSIX format we may find that it has issues finding DLLs, or generates Access Denied warnings amongst other annoying things.

So the folks over at Microsoft created the Package Support Framework (PSF), which was later forked by the great Tim Mangan to include additional functionality.  The PSF essentially comprises of an executable which acts as the “PSF launcher”, a bunch of associated DLLs that provide “fix-ups”, and a config.json file which tells the launcher what to fix!

How Does The Package Support Framework Work?

In simple terms, we redirect any problematic shortcuts to the PSF launcher instead of the original executable.  The PSF launcher then reads the associated config.json file which tells it what to do in terms of which executable to launch (the original executable) and which fix-ups to apply at runtime.

Why AlkanePSF?

When I originally wrote this (over a year ago), injecting the PSF into an MSIX package manually was a bit laborious and fiddly to say the least.  The official MSIX packaging tool GUI didn’t support PSF configurations at the time (if I recall), and amending JSON files is prone to human error.  So I created this PowerShell module called AlkanePSF that makes life easy (or easier).

The advantages of this scripted approach are that:

  • It doesn’t require the MSIX packager.  You can extract, inject fix-ups, recompile and sign on-the-fly.
  • It could be used as part of an automation pipeline to inject fixes into a bunch of packages on a file share, or perhaps at the end of an automated conversion batch.
  • It supports Tim Mangan’s PSF (which includes fix-ups like the MFR fix-up), which the official MSIX packaging tool doesn’t natively support.
  • It’s fast when making fix-up modifications and re-retesting packages.

Caveats

  • Whilst it does support every fix-up type, it doesn’t support every single fix-up configuration.

Assumptions

  • You’ve already packaged your MSIX, launched it and it doesn’t work.
  • You might have run some process monitoring, and have an understanding of which fixups you might need to apply.  Maybe read the Package Support Framework Overview first.
  • You have a code signing certificate and a password.
  • You have a basic understanding of fix-ups.  If not, use the links below to understand the different types.

Available Cmdlets

Set-AlkanePSFConfiguration – Configure AlkanePSF for input and output.

Install-AlkanePSFPrerequisite – Installs Windows SDK/Microsoft PSF/Tim Mangan PSF.

New-AlkanePSFStagedPackage – Extracts/stages MSIX.

Get-ApplicationId – Returns a list of application IDs from the AppxManifest.xml (for reference)

Add-AlkanePSFApplication – Adds an application from the AppxManifest.xml to “fix”.  This must be called for any application that requires fixing.

Add-AlkanePSFFileRedirectionFixup – Adds a FileRedirectionFixup to the application.

Add-AlkanePSFRegLegacyFixup – Adds a RegLegacyFixup to the application.

Add-AlkanePSFEnvVarFixup – Adds a EnvVarFixup to the application.

Add-AlkanePSFDynamicLibraryFixup – Adds a DynamicLibraryFixup to the application.

Add-AlkanePSFMFRFixup – Adds a MFRFixup to the application (Tim Mangan only).

Add-AlkanePSFTraceFixup – Adds support for the trace module.

Add-AlkanePSFStartScript – Adds a StartScript.

Add-AlkanePSFEndScript – Adds an EndScript.

Add-AlkanePSFCapability – Adds capabilities (Such as elevation)

Add-AlkanePSFDependency – Adds dependencies (Such as Visual C++)

Remove-AlkanePSFApplication – Removes applications from AppxManifest.xml

Remove-AlkanePSFShortcut – Removes shortcuts from AppxManifest.xml

Add-AlkanePSFStringReplace – replaces strings (using a regular expression) in the AppxManifest.xml

Add-AlkanePSFProtocol – Adds a protocol for a given application ID

Set-AlkanePSF – Updates AppxManifest.xml, generates config.json.

New-AlkanePSFResourcesPRI – Recompiles resources if we need to add new assets.

New-AlkanePSFMSIX – Compiles and signs new MSIX.

Usage of Free MSIX Packaging Tool for the Package Support Framework

One day I’ll get around to documenting it properly.  But until that day:

Install and import the module:

Install-Module AlkanePSF
Import-Module AlkanePSF

And use it like so (I’ve provided some example cmdlets and their arguments)

cls

#configure AlkanePSF
Set-AlkanePSFConfiguration -MSIXInputFilePath "C:\Alkane-SampleApp-1.0.0\Alkane-SampleApp-1.0.0.msix" `
-MSIXOutputFilePath "C:\Alkane-SampleApp-1.0.0\Fixed\Alkane-SampleApp-1.0.0.msix" `
-MSIXCertificateFilePath "C:\Alkane.pfx" `
-MSIXCertificatePassword (ConvertTo-SecureString "certpass" -AsPlainText -Force) `
-MSIXArchitecture "64" `
-PSFType "TM" `
-TimManganZipUrl "https://github.com/TimMangan/MSIX-PackageSupportFramework/blob/develop/ZipRelease.zip-v2024-10-26.zip?raw=true"

#install prereqs (SDK, Tim Managan's PSF etc)
Install-AlkanePSFPrerequisite -ForceReinstall $false

#Stage and extract our MSIX package (in the same location as our input MSIX) so we can apply fixups
New-AlkanePSFStagedPackage

#Get list of applications for our reference
Get-ApplicationId

#********************************************
#Add apps we want to fix - every fixup needs an app
#********************************************

Add-AlkanePSFApplication -ApplicationId "SAMPLEAPP"
#Add-AlkanePSFApplication -ApplicationId "SAMPLEAPP" -WorkingDirectory "VFS\Alkane" -Arguments @("arg1","arg2") -InPackageContext $true -ScriptExecutionMode "-ExecutionPolicy Bypass"

		
#********************************************
#Define fixups we want to apply
#********************************************

#Add-AlkanePSFTraceFixup -ApplicationId "SAMPLEAPP" -FixupTraceMethod "outputDebugString" -FixupWaitForDebugger $false -FixupTraceFunctionEntry $false -FixupTraceCallingModule $true -FixupIgnoreDllLoad $true -FixupTraceLevelProperty "default" -FixupTraceLevelValue "allFailures" -FixupBreakOnProperty "default" -FixupBreakOnValue "allFailures"

#Add env var fixups
#Add-AlkanePSFEnvVarFixup -ApplicationId "SAMPLEAPP" -FixupVarName "alkaneenv1" -FixupVarValue "alkanevalue1" -FixupVarUseRegistry $true
#Add-AlkanePSFEnvVarFixup -ApplicationId "SAMPLEAPP" -FixupVarName "alkaneenv2" -FixupVarValue "alkanevalue2" -FixupVarUseRegistry $true

#Add DLL fixups
#Add-AlkanePSFDynamicLibraryFixup -ApplicationId "SAMPLEAPP" -FixupDllName "alkane1.dll" -FixupDllFilepath "VFS\Alkane\alkane1.dll"
#Add-AlkanePSFDynamicLibraryFixup -ApplicationId "SAMPLEAPP" -FixupDllName "alkane2.dll" -FixupDllFilepath "VFS\Alkane\alkane2.dll"

#Add reg legacy fixups
#Add-AlkanePSFRegLegacyFixup -ApplicationId "SAMPLEAPP" -FixupType "FakeDelete" -FixupHive "HKCU" -FixupAccess "FULL2RW" -FixupPatterns@(".+\.exe",".+\.dll")
#Add-AlkanePSFRegLegacyFixup -ApplicationId "SAMPLEAPP" -FixupType "ModifyKeyAccess" -FixupHive "HKLM" -FixupAccess "Full2MaxAllowed" -FixupPatterns@(".+\.exe",".+\.dll")

#Add MFR fixups (only applies to Tim Mangan PSF)
#Add-AlkanePSFMFRFixup -ApplicationId "SAMPLEAPP" -FixupType "overrideLocalRedirections" -FixupName "ThisPCDesktopFolder" -FixupMode "Disabled"
#Add-AlkanePSFMFRFixup -ApplicationId "SAMPLEAPP" -FixupType "overrideLocalRedirections" -FixupName "Personal" -FixupMode "traditional"

#Add file redirection fixups
#Add-AlkanePSFFileRedirectionFixup -ApplicationId "SAMPLEAPP" -FixupType "packageDriveRelative" -FixupBase "example3" -FixupPatterns @(".+\.log")
#Add-AlkanePSFFileRedirectionFixup -ApplicationId "SAMPLEAPP" -FixupType "knownFolders" -FixupId "ProgramFilesX64" -FixupBase "example1" -FixupPatterns @(".+\.log")
#Add-AlkanePSFFileRedirectionFixup -ApplicationId "SAMPLEAPP" -FixupType "packageRelative" -FixupBase "example2" -FixupPatterns @(".+\.log")
#Add-AlkanePSFFileRedirectionFixup -ApplicationId "SAMPLEAPP" -FixupType "knownFolders" -FixupId "ProgramFilesX64" -FixupBase "example4" -FixupPatterns @(".+\.log")
#Add-AlkanePSFFileRedirectionFixup -ApplicationId "SAMPLEAPP" -FixupType "packageDriveRelative" -FixupBase "example3" -FixupPatterns @(".+\.log")

#An example of applying dynamic file redirection fixups
$stagingFolder    = "C:\Alkane-SampleApp-1.0.0\Alkane-SampleApp-1.0.0_Staged" 
$vfsFolder    = "$stagingFolder\VFS"

#find unique directories containing log files
Get-ChildItem -Path $vfsFolder -Recurse  -Include *.log | Select -ExpandProperty DirectoryName -Unique | foreach {
    $fullPath = $_.Replace($vfsFolder,"VFS")
    Add-AlkanePSFFileRedirectionFixup -ApplicationId "SAMPLEAPP" -FixupType "packageDriveRelative" -FixupBase $fullPath -FixupPatterns @(".+\.log")
}

#********************************************
#Add scripts we want to run for the relevant application(s)
#********************************************

Add-AlkanePSFStartScript -ApplicationId "SAMPLEAPP" -ScriptSourcePath "C:\Alkane_SAMPLEAPP_1.0.0\Scripts\ExampleScript.ps1" -ScriptArguments @() -RunInVirtualEnvironment $false -ShowWindow $false -StopOnScriptError $false -WaitForScriptToFinish $true -Timeout 30 -RunOnce $false
#Add-AlkanePSFEndScript -ApplicationId "SAMPLEAPP" -ScriptSourcePath "VFS\ProgramFilesX86\Alkane\example.exe" -ScriptArguments @("-install") -RunInVirtualEnvironment $true -ShowWindow $true -StopOnScriptError $false -WaitForScriptToFinish $true -Timeout 30 -RunOnce $false

#********************************************
#Add capabilities to AppxManifest.xml
#********************************************

Add-AlkanePSFCapability -Capability "allowElevation"

#********************************************
#Add dependencies to AppxManifest.xml
#********************************************

#Add-AlkanePSFDependency -DependencyName "Microsoft.VCLibs.110.00.UWPDesktop" -DependencyMinVersion "11.0.61135.0" -DependencyPublisher "CN=Microsoft Corporation, O=Microsoft Corporation, L=Redmond, S=Washington, C=US"

#********************************************
#Remove applications from AppxManifest.xml
#********************************************

Remove-AlkanePSFApplication -ApplicationId SAMPLEAPP

#********************************************
#Remove shortcuts from manifest (-ShortcutName is "like" comparison, hence this example will remove all desktop shortcuts)
#********************************************

Remove-AlkanePSFShortcut -ShortcutName "[{Desktop}]"

#********************************************
#Commit changes to AppxManifest.xml and config.json (set OpenConfigJson to true to view the resultant JSON at the end)
#********************************************

Set-AlkanePSF -OpenConfigJson $false

#********************************************
#Compile and sign (staged package) new MSIX
#********************************************

New-AlkanePSFMSIX

You can quickly tweak and regenerate your MSIX file to test modifications in a matter of seconds – just re-run the script!

Hint: If you want to view the config.json at the end of each compilation, set -FixupOpenConfigJson $true.

This is work in progress, so your feedback in the comments below is always welcome!

Installing the Package Support Framework (PSF) Using PowerShell

This blog provides an example of installing the Package Support Framework (PSF) using PowerShell.

We’ve discussed previously what the Package Support Framework (PSF) for MSIX is, and how we can use it to create fixups for MSIX packages.  We also outlined how to manually obtain the PSF files required to fix our MSIX applications.  But this post provides a more automated approach of installing PSF for MSIX:

Write-Host "Installing PSF..."

$nuget = get-packagesource | Where-Object ProviderName -eq "Nuget"
if ($nuget -eq $null) {
    Register-PackageSource -Name nuget.org -Location https://www.nuget.org/api/v2 -ProviderName NuGet
    Install-Package -Name Microsoft.PackageSupportFramework -ProviderName Nuget -Force
} else {
    $package = Get-Package | Where-Object Name -eq "Microsoft.PackageSupportFramework"
    if ($nuget -eq $null) {
        Install-Package -Name Microsoft.PackageSupportFramework -ProviderName Nuget -Force
    }
}

$nupkg = Get-Package | Where-Object Name -eq "Microsoft.PackageSupportFramework" | Select -ExpandProperty Source
$psfBinFolder = (get-item $nupkg).Directory.FullName + "\bin\"

write-host "The PSF bin folder is $psfBinFolder"

Write-host "Finished"

MSIX Shortcut Working Directory/Start In

MSIX doesn’t natively support shortcut ‘Start In’ working directories, that you would typically see when viewing the properties of an lnk shortcut.  This blog explains how we can use the Package Support Framework (PSF) to add an MSIX Shortcut Working Directory/Start In location.

MSIX Shortcut Working Directory/Start In

Sometimes when we launch an application, the shortcut ‘Start In’ location tells the executable where to look for certain files and configurations at runtime.  If this value isn’t present (as is the case in MSIX shortcuts) the application will likely throw errors.

To remediate this we can use the Package Support Framework (PSF) to set a working directory/start in location at runtime.

The principle is almost identical to when we added MSIX shortcut arguments/parameters.  So in the main you should follow that blog.

The only difference is the contents of the config.json file.  Using the previous example linked to above, the original config.json file to provide MSIX shortcut arguments/parameters was:

{
	"applications": [
        {
            	"id": "ALKANEAPP",
            	"executable": "VFS\\ProgramFilesX86\\Alkane\\Alkane.exe", 
            	"arguments": "-alkaneargument" 
	}] 
}

We can amend this to become:

{
	"applications": [
        {
            	"id": "ALKANEAPP",
            	"executable": "VFS\\ProgramFilesX86\\Alkane\\Alkane.exe", 
            	"arguments": "-alkaneargument",
            	"workingDirectory": "VFS\\ProgramFilesX86\\Alkane\\"  
	}] 
}

You will note the addition of the ‘workingDirectory’ value which points to the directory where Alkane.exe resides.  It really is that simple.


MSIX Shortcut Arguments/Parameters

MSIX  doesn’t natively support shortcut arguments.  This blog explains how we can use the Package Support Framework (PSF) to add MSIX shortcut arguments/parameters.

Install the Package Support Framework (PSF)

There are two options to install the PSF for MSIX.

Option 1 – Manually Download PSF for MSIX

  • Navigate to the Package Support Framework page on Nuget: https://www.nuget.org/packages/Microsoft.PackageSupportFramework/
  • Click Download Package and you will download a file called something similar to: microsoft.packagesupportframework.[version].nupkg
  • Rename the extension from nupkg to zip, and extract it.
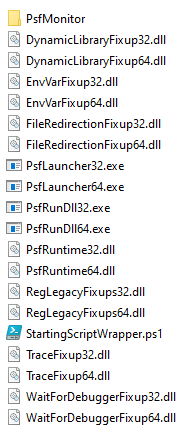
  • Navigate to the bin folder and copy all the contents somewhere local.  These files form the Package Support Framework and we’ll need some of them later on.

Package Support Framework

Option 2 – Install PSF for MSIX using Powershell

Follow our post on how to install the Package Support Framework for MSIX using PowerShell.

Add Shortcut Arguments/Parameters To Your MSIX

      • Open your MSIX in edit mode using the MSIX Packaging Tool.
      • Navigate to the Package Information tab and scroll down to the Manifest File section.  Click Open File, and it will open the AppxManifest.xml file for your package.
      • In the AppxManifest.xml file will be a node called Applications, and this may contain one or many sub-nodes called Application.  This represents all the applications in your package and will look similar to this:
        <Applications>
        	<Application Id="ALKANEAPP" Executable="VFS\ProgramFilesX86\Alkane\Alkane.exe" EntryPoint="Windows.FullTrustApplication">
        		<uap:VisualElements BackgroundColor="transparent" DisplayName="Alkane Solutions" Square150x150Logo="Assets\ALKANEAPP-Square150x150Logo.png" Square44x44Logo="Assets\ALKANEAPP-Square44x44Logo.png" Description="Alkane Solutions">
                <uap:DefaultTile Wide310x150Logo="Assets\ALKANEAPP-Wide310x150Logo.png" Square310x310Logo="Assets\ALKANEAPP-Square310x310Logo.png" Square71x71Logo="Assets\ALKANEAPP-Square71x71Logo.png" />
        		</uap:VisualElements>
        		<Extensions>
        			<desktop7:Extension Category="windows.shortcut">
        			<desktop7:Shortcut File="[{Programs}]\Alkane\Alkane Solutions.lnk" Icon="VFS\ProgramFilesX86\Alkane\App.exe" />
        			</desktop7:Extension>
        		</Extensions>
            </Application>
        </Applications>
      • Make a note of the Application Id  ALKANEAPP and also the Executable value of VFS\ProgramFilesX86\Alkane\Alkane.exe because we’ll need these values later.
      • Change the Executable value to be PsfLauncher32.exe.  We are now telling the package that when the shortcut is clicked we want to launch PsfLauncher32.exe and NOT Alkane.exe.   The second line should now look like this:
        <Application Id="ALKANEAPP" Executable="PsfLauncher32.exe" EntryPoint="Windows.FullTrustApplication">
      • Now save the file and close it.
      • We now need to add the PSF files to our package.  Navigate to the Package Files tab, right click on the Package folder and click Add file….
      • From your downloaded Package Support Framework (PSF) select the following 6 files (hold down ctrl to select them all) and add them to your package (we don’t need the others, which are related to PSF ‘fixups’):
        • PsfLauncher32.exe
        • PsfRuntime32.dll
        • PsfRunDll32.exe
        • PsfLauncher64.exe
        • PsfRuntime64.dll
        • PsfRunDll64.exe

        Note – we really only need to add the files for our application architecture (NOT our operating system architecture).  So if our application was 32-bit and our operating system was 64-bit, we would just add the 3 files containing ’32’.

      • Now we know our package is opening PsfLauncher32.exe, but it doesn’t know what to do with it!  So we need to create a file called config.json to tell our package what to do.
      • Open notepad (or Notepad++) and create/save a file called config.json with the following content:
        {
        	"applications": [
                {
                    	"id": "ALKANEAPP",
                    	"executable": "VFS\\ProgramFilesX86\\Alkane\\Alkane.exe", 
                    	"arguments": "-alkaneargument" 
        	}] 
        }
      • You will notice that we have referenced the application ID in the AppxManifest.xml (ALKANEAPP), and we have specified the executable to be the original executable in the AppxManifest.xml (VFS\\ProgramFilesX86\\Alkane\\Alkane.exe).  You will also notice that for valid JSON we either need to escape backslashes with another backslash (\\) or we need to replace them with a forward slash.  Finally you will notice that we are passing in an argument of -alkaneargument.
      • We now need to add the config.json to our package.  Navigate to the Package Files tab, right click on the Package folder and click Add file….
      • Add the config.json file, which should sit alongside the PSF files you added earlier.
      • Save your package and test it.

We have essentially told our MSIX shortcut to launch PsfLauncher32.exe from the shortcut. PsfLauncher32.exe will then read the config.json file and subsequently launch VFS\\ProgramFilesX86\\Alkane\\Alkane.exe with an argument of -alkaneargument.

A Comparison Between MSIX and App-V Application Packaging Technologies

Microsoft App-V and MSIX are both technologies for packaging and delivering applications, but they differ fundamentally. App-V uses virtualisation to separate apps from the OS at runtime, while MSIX employs containerisation, which keeps apps isolated at all times, even when they’re not running.

MSIX is a modern packaging solution that supports UWP (Universal Windows Platform) apps alongside traditional Win32 applications. It offers better security, efficient updates, and flexible deployment options, making it the preferred choice for contemporary environments.

Virtualisation vs. Containerisation

The core distinction between App-V and MSIX lies in how they isolate applications.

  • App-V uses runtime virtualisation, which separates apps from the operating system while they are running. Once the app is closed, some aspects (like cached files) may still be exposed in the system.
  • MSIX, on the other hand, provides permanent containerisation. It isolates the app entirely from the system, ensuring that files are kept within the container, providing both isolation and security at all times.

This containerisation approach is more aligned with modern security and deployment strategies, reducing system conflicts and enhancing stability.

Optimised Storage and Downloads

MSIX optimises storage and bandwidth by using a file hashing mechanism. When apps share common components, only a single copy of each file is stored and used across multiple apps or users. During app delivery or updates, the system checks for existing files and only downloads new or changed file blocks, leading to more efficient use of resources. In contrast, App-V may duplicate files across apps, leading to higher storage and bandwidth usage.

How Updates Are Handled

Updates in MSIX are highly efficient due to its delta update mechanism, which means only changed portions of the app are downloaded. This results in smaller, faster updates, minimising disruptions and reducing bandwidth usage. For App-V, updating an application typically requires the full package to be downloaded and delivered to the client, which can be slower and more resource-intensive.

The difference in how updates are handled is one of the reasons why MSIX is favoured for modern app management, especially in environments with frequent updates or limited network capacity.

Signing and Security

MSIX mandates that all packages be digitally signed, which ensures the authenticity and integrity of the application. This makes MSIX more secure by preventing tampered or unauthorised applications from running. App-V, however, does not require digital signing, making it less secure in comparison.

By enforcing signed packages, MSIX ensures that only trusted applications are installed, providing a significant advantage in environments where security is a top concern.

MSIX App Attach and Dynamic Application Delivery

MSIX supports dynamic application delivery through MSIX app attach, particularly in virtual desktop environments like Azure Virtual Desktop. With MSIX app attach, apps don’t need to be permanently installed. Instead, they are dynamically “attached” to a session when a user interacts with them, such as by clicking an app shortcut. This enables on-demand application delivery, minimising storage usage and streamlining management in virtualised environments. It also enhances scalability, making it easier to deploy and manage apps across multiple users without needing to pre-install them.

This approach is a game-changer for large organisations and virtual desktop environments, allowing for rapid application access without the overhead of installing apps for each user.

In summary, while both App-V and MSIX provide application delivery solutions, MSIX stands out with its modern features like containerisation, efficient updates, and robust security. Its support for UWP and dynamic application delivery through app attach makes it the ideal choice for modern IT environments looking to streamline app management and improve security.

What is MSIX and What Are The Advantages and Disadvantages of MSIX?

As enterprises start to investigate the feasibility of migrating applications to the MSIX format, it’s prudent to know what is MSIX and what are the advantages and disadvantages of MSIX?

MSIX is a modern packaging format designed to simplify and streamline the process of distributing Windows applications. It was introduced by Microsoft in 2018 as a successor to the traditional MSI (Windows Installer) format.

MSIX offers several benefits over MSI, including improved reliability, simplified deployment, and better security. It uses the same underlying technology as the Windows Store to provide a sandboxed environment for applications, which helps to prevent conflicts and improve system stability.

One of the key advantages of MSIX is its ability to handle dependencies and updates more efficiently. With MSIX, applications can be updated automatically in the background, without the need for user intervention. This helps to ensure that users always have the latest version of an application and reduces the burden on IT staff who might otherwise need to manage updates manually.

MSIX also includes support for modern deployment technologies, such as containerization, which can help to further improve reliability and security. Overall, MSIX is a significant step forward in the world of application packaging and is quickly gaining popularity among developers and IT professionals.

MSIX Advantages and Disadvantages

MSIX offers several advantages over traditional installation methods, but there are also a few potential disadvantages to consider. Here are some of the key advantages and disadvantages of MSIX:

Advantages:

  1. Improved reliability: MSIX uses a containerisation approach, which helps to ensure that applications don’t interfere with other parts of the system. This can improve overall system stability and reduce the risk of application conflicts.
  2. Simplified deployment: MSIX packages are self-contained and can be easily distributed and installed without the need for complex scripts or installer packages. This can simplify the deployment process for IT administrators and reduce the likelihood of deployment errors.
  3. Better security: MSIX packages are digitally signed and can include security policies and controls to help prevent malware and other security threats.
  4. Automatic updates: MSIX includes support for automatic updates, which can help ensure that users always have the latest version of an application.

Disadvantages:

  1. Limited backward compatibility: MSIX is only supported on Windows 10 version 1709 and later, so applications packaged in MSIX format may not work on older versions of Windows.
  2. Limited tooling: While Microsoft provides tools for creating and deploying MSIX packages, the ecosystem around MSIX is still relatively new, and some third-party tools and services may not support it yet.
  3. Complex packaging process: Creating an MSIX package can be more complex than traditional installation methods, particularly if the application has complex dependencies or requires custom installation scripts.
  4. Limited customization: MSIX packages are designed to be self-contained, which can limit the ability to customize the installation process or include custom scripts or configurations.

Is MSIX Ready for the Enterprise?

MSIX is becoming increasingly popular in the enterprise space and is considered to be a viable packaging and deployment format for Windows applications. Here are some reasons why MSIX is suitable for the enterprise:

  1. Improved reliability: MSIX’s containerization approach can help improve system stability and reduce the risk of application conflicts, which is especially important in the enterprise where IT administrators need to manage a large number of applications.
  2. Better security: MSIX’s support for digital signatures and security policies can help prevent malware and other security threats, making it a more secure option for enterprise applications.
  3. Simplified deployment: MSIX’s self-contained packages can be easily distributed and installed, reducing the need for complex deployment scripts and making it easier for IT administrators to manage application deployment across a large number of devices.
  4. Automatic updates: MSIX supports automatic updates, which can help ensure that users have the latest version of an application without the need for manual intervention.
  5. Support from Microsoft: Microsoft has been actively promoting MSIX as the future of Windows application packaging, and is investing resources to improve its support for the format.

That being said, there are still some limitations to consider when using MSIX in the enterprise. For example, MSIX is not compatible with older versions of Windows, and some third-party tools and services may not yet fully support the format. Additionally, the complexity of the packaging process may require additional training or expertise for IT administrators who are new to the format.